Welcome to stop #14 on the Stampin' Addicts Winter Holiday Blog Hop! I've been on a bit of a hiatus the past couple of weeks, but I'm back and just in time for another great hop. If you're hoping in order than you've arrived from Jennifer Timko's Stampin' On the Fly and her fabulous take on the Expressions Thinlits. (I feel a few CASEs coming on Jen!). If this is your first stop, we are all linked in a circle so you won't miss a thing. If you get lost or want to chat it up, head on over to Stampin' Addicts!
I'm featuring the Gift Bow Bigz Die from the Holiday Catalog on this hop. I picked this because I needed to stretch myself and actually use this die that I bought. I have three projects to share and I will be sharing more details on them next week here so check back!
My first project I'm sharing isn't really my project at all (or at least the main part of it isn't). I received this fabulous wreath as a swap from fellow Stampin' Addict Angie Pegram at convention this past summer. My part of the project was to add the paper bow to the bottom of it. Here is a close up of the bow:
You can see that I have used multiple "loops" from the die to make this bow a little fuller. I also used a glimmer brad to hold it all together.
My second project was inspired by a project Shelli Gardner shared on the mainstage at convention this year. Again, I used multiple loops, but this time I added some interest to the bow by fringing it and adding the ribbon.
And last, but not least is a card. Here I used the "tail" pieces to create a flat bow that could easily be mailed. Love this silver foil paper and the textured card stock that are also in the Holiday Catalog and how much interest they add to a simple card like this.
Thanks for hopping a long with us today. Now you're off to Heidi Bak's Running with Scissors and her amazing projects made with the Tags 4 You stamp set.
Showing posts with label 2013 Holiday Catalog. Show all posts
Friday, October 4, 2013
Monday, September 16, 2013
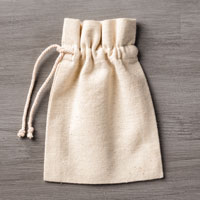
Muslin Bag Halloween Treat
There are so many fun things you could do with these bags for the upcoming holidays. Today, I'm going to show you a Halloween idea:
To make this, I used the Chevron Template from the Build a Banner Simply Created Kit and a spritzer to add the color to the bag. For the tag, I cut the round parts off the sides a Deco Label Framelit Die Cut and used one of the smaller pieces from chalk talk to make the hole in the top for the ribbon.
This is just one of the projects that will be available to make at my Spooktacular Stampin' Buffet on September 27 & 28. Let me know if you are coming and what you want to make.
Friday, August 9, 2013
Stampin' Addicts Fall Blog Hop: Banner Kit
Welcome to stop #9 on the Stampin' Addicts Fall Blog Hop. This hop focuses on Halloween and Thanksgiving stamps, kits and accessories from the Holiday catalog. Then in October, we'll showcase the Holiday section of the catalog. (Two hops = Twice the Fun!) If you are hoping in order, than you've just arrived from the very talented Mary Rindal's {Scrap and Stamp with Mary} look at the Witch's Brew Designer Series Paper and Washi Tape. She always has fabulous creations. If this is your first stop on the hop, all the blogs are linked in a continuous circle so you won't miss a thing. If you get lost along the way or want to chat it up, visit Stampin' Addicts.
I love to create banners. I've featured them on the hops before so it probably won't be any surprise that I picked the Build a Banner Simply Created Kit and the Halloween Banner Simply Created Accessory Kit to show you today. The first kit includes 18 blank canvas pennants and the stencils you need to create different backgrounds and letters on the pennants. The second kit helps you turn those plain pennants into a SPOOKY (or other Halloween word) banner. And as a reminder, you can click on any of the pictures to get a closer look.
My first project showcases these two kits used together:
I pretty much followed the instructions that come with the Halloween Banner Accessory Kit when I put this together, except I added a titch more card stock and some extra ribbon that I died to match the kit.
Now, what else could you do with that same Halloween Banner Accessory Kit? Sara Douglass gave us an idea at convention:
This is a CASE of her mixed-media project, but I've added a few of my own elements to it as well. See the chevron background behind the skull and crossbones? I used the template that comes in the Build a Banner Kit to put it on the canvas. The only accessories on here that aren't in the other kit are the letters,Witch's Brew Designer Series Paper and a little linen thread.
And the last one I am showing today is actually the first project I made with the kit:
For this one, I used the banners and the templates to created a Thanksgiving-themed banner featuring the Sweater Weather Designer Series Paper and the Burlap Ribbon from the Holiday Catalog and the Natural Buttons from the regular catalog.
I will be sharing more about the banners, including some tips with the templates, here on my blog on Monday. And on Wednesday, I'll share more about the mixed-media project. So be sure to check back. Now you are off to Adriana's Escape to Stamp and her look at the adorable Oh Goodie stamp set. You will not be disappointed. Happy hopping!
I love to create banners. I've featured them on the hops before so it probably won't be any surprise that I picked the Build a Banner Simply Created Kit and the Halloween Banner Simply Created Accessory Kit to show you today. The first kit includes 18 blank canvas pennants and the stencils you need to create different backgrounds and letters on the pennants. The second kit helps you turn those plain pennants into a SPOOKY (or other Halloween word) banner. And as a reminder, you can click on any of the pictures to get a closer look.
My first project showcases these two kits used together:
I pretty much followed the instructions that come with the Halloween Banner Accessory Kit when I put this together, except I added a titch more card stock and some extra ribbon that I died to match the kit.
Now, what else could you do with that same Halloween Banner Accessory Kit? Sara Douglass gave us an idea at convention:
This is a CASE of her mixed-media project, but I've added a few of my own elements to it as well. See the chevron background behind the skull and crossbones? I used the template that comes in the Build a Banner Kit to put it on the canvas. The only accessories on here that aren't in the other kit are the letters,Witch's Brew Designer Series Paper and a little linen thread.
And the last one I am showing today is actually the first project I made with the kit:
For this one, I used the banners and the templates to created a Thanksgiving-themed banner featuring the Sweater Weather Designer Series Paper and the Burlap Ribbon from the Holiday Catalog and the Natural Buttons from the regular catalog.
I will be sharing more about the banners, including some tips with the templates, here on my blog on Monday. And on Wednesday, I'll share more about the mixed-media project. So be sure to check back. Now you are off to Adriana's Escape to Stamp and her look at the adorable Oh Goodie stamp set. You will not be disappointed. Happy hopping!
Wednesday, July 31, 2013
Convention Swaps & Sneak Peek: Santa's List
It's Christmas in July! The sad thing is I've had my preorder from the Holiday Catalog for several weeks and this is the first thing I am sharing on my blog:
I made this card for a Christmas Card swap at convention. It's the only swap I joined multiple groups of this year and I was not disappointed in the least. Fabulous swaps Stampin' Addicts!
The Holiday Catalog goes live tomorrow, so if you haven't received your copy of it yet, please let me know so I can get one to you now.
I made this card for a Christmas Card swap at convention. It's the only swap I joined multiple groups of this year and I was not disappointed in the least. Fabulous swaps Stampin' Addicts!
The Holiday Catalog goes live tomorrow, so if you haven't received your copy of it yet, please let me know so I can get one to you now.
Subscribe to:
Posts (Atom)