 |
| Colors: Basic Black, Pumpkin Pie and Crushed Curry. Stamps:Halloween Bash. Punches: Decorative Label and Large Oval. Accessories: Witch's Brew Designer Series Paper, Iridescent Ice Embossing Powder, Pumpkin Pie Chevron Ribbon and Basic Black 1/8" Taffeta Ribbon. |

Friday, September 20, 2013
Halloween Gable Box
When I was looking for one more treat box for my Spooktacular Buffet, Janine Tinklenberg posted one on her blog that was perfect. My version looks like this:
These little boxes are so cute a pretty easy to make from half a sheet of card stock. Dawn Olchefske has a video tutorial on how to create this boxes on her blog. They would make great little favor boxes for any occasion.
Wednesday, September 18, 2013
Stampin' Addicts Recycle Challenge #5
Yapha Mason posted a great color challenge for us this week on the Stampin' Addicts Recycle Challenge: Soft Suede, Pool Party, & Pear Pizzaz. I love these colors so I knew I was ready to jump in and play along:
The World Map stamp was the first stamp to go on my wish list from this catalog. Then they had to make a change to it so it wasn't available to order when the rest of the catalog went live. I did end up ordering it when it was available, but by then, I was playing with Halloween and Christmas stamps and didn't have much of a chance to ink it up. I thought this challenge was the perfect opportunity.
To make the card, first I stamped the map in Soft Suede Ink and then quickly dumped clear embossing powder all over it and heat set it. Then I used my Aqua Painter to color the ocean Pool Party and the land Pear Pizzaz. This didn't work out perfectly because the Soft Suede did still smear a little bit, but it kind of just adds to the antique feeling of the card.
Head on over and play along with this week's challenge. You can also see, like and repin all the projects on Pinterest and help us determine the winner of this week's challenge. The challenge ends Friday, September 27 but don't put it off. The player with the most repins and likes wins.
 |
| Colors: Soft Suede, Pool Party, Pear Pizzaz, & Naturals Ivory. Stamps: World Map & Really Good Greetings. Big Shot: Chalk Talk Framelits. Accessories: Clear Embossing Powder, Natural 7/16" Trim & Antique Brads. |
To make the card, first I stamped the map in Soft Suede Ink and then quickly dumped clear embossing powder all over it and heat set it. Then I used my Aqua Painter to color the ocean Pool Party and the land Pear Pizzaz. This didn't work out perfectly because the Soft Suede did still smear a little bit, but it kind of just adds to the antique feeling of the card.
Head on over and play along with this week's challenge. You can also see, like and repin all the projects on Pinterest and help us determine the winner of this week's challenge. The challenge ends Friday, September 27 but don't put it off. The player with the most repins and likes wins.
Monday, September 16, 2013
Muslin Bag Halloween Treat
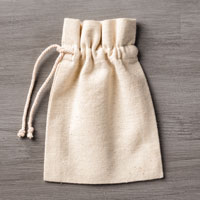
There are so many fun things you could do with these bags for the upcoming holidays. Today, I'm going to show you a Halloween idea:
 |
| Colors: Whisper White, Basic Black, Pumpkin Pie and Crushed Curry. Stamps: Halloween Bash. Big Shot: Deco Label and Chalk Talk Framelits. Punch: Modern Label. Accessories: Mini Muslin Bag, Build a Banner Simply Created Kit Chevron Template, Black Chevron and Pumpkin Pie 1/8" Taffeta Ribbon. |
To make this, I used the Chevron Template from the Build a Banner Simply Created Kit and a spritzer to add the color to the bag. For the tag, I cut the round parts off the sides a Deco Label Framelit Die Cut and used one of the smaller pieces from chalk talk to make the hole in the top for the ribbon.
This is just one of the projects that will be available to make at my Spooktacular Stampin' Buffet on September 27 & 28. Let me know if you are coming and what you want to make.
Friday, September 13, 2013
Bat Candy Bar Holder
Halloween is still six weeks away, but my Spooktacular Stampin' Buffet is only two weeks away! This is always my most popular class of the year because my customers ♥ Halloween. It's always a bit of a challenge to come up with some new and different kind of treat holder for this class, but I think this one turned out so cute:
When you take the belly band off and open it up it looks like this:
 Belinda Tubby has a video tutorial on how to make these on YouTube. I changed it up just a bit by using the Elegant Butterfly punch to make the ears and the Modern Label punch to make the feet. For those that prefer written directions instead of a video here are the basics:
 |
| Colors: Basic Black, Pumpkin Pie, Whisper White, Summer Starfruit. Stamps: Halloween Bash. Big Shot: Labels Collection Framelits. Punches: Decorative Label, Elegant Butterfly, Modern Label, 2-1/2", 1-3/4", 1/2" Circles, & Circle from Itty Bitty Shape Punch Pack. Accessories: Witch's Brew Designer Series Paper, Basic Black Chevron Ribbon, Brights Glimmer Brads. |

- Start with a piece of black card stock 7-1/2" x 6-1/2"
- Place it on the Simply Scored Board the long way and score at 2-1/2" and 5".
- Turn the card stock the other way and score at 1" from the edge to the first score line and from the second score line to the other edge. (So there is no score line in the middle).
- Cut the 1" x 2-1/2" corners away along the score lines.
- Use the 2-1/2" Circle punch to make a template for the head. (Punch a circle out and then trace it onto the top section to make the rounded head.)
- To make the wings, start about 1/2" in from at the top corner and use the 2-1/2" circle punch to punch the first notch. Move down to the end of that notch and punch in about 3/4" from the edge.
- Switch to the 1-3/4" circle punch and start at the bottom at the score line and punch about 1/2" in from the bottom. Then use the 1-3/4" circle punch to notch the corner and make it look like a bat's wing.
- Repeat on the other side.
- Use the top half of the butterfly punch to make the ears (cut it in half to make two) and glue to the top
- Use the 1/2" circle and the small circle from the Itty Bitty Punch to make the eyes.
- Use the modern label punch for the feet. Cut one in half and glue them to the bottom.
- Attach the candy bar to the center and add a belly band.
Wednesday, September 11, 2013
Split Negative Technique
Last week, Mary Rindal posted the third recycle challenge on Stampin' Addicts using a technique that I've never done before: Split the Negative. This is a fun technique and the original directions on Stampin' Addicts that Debbi Silberberg posted there make it easy peasy. This is what I came up with:
I kept the card itself very simple and let the technique speak for itself. You'll see that my image isn't split exactly in half, we'll just pretend that was intentional. With all the colored embossing powder Stampin' Up! offers now, there is no reason to limit this technique to just Black and White. I was picturing a fun Christmas card with Cherry Cobbler and White.
If you don't have time to play along with the challenge, you can still help with the challenge. Head over to Pinterest and like and repin your favorites. The player who gets the most repins and likes gets to pick the next challenge.
 |
| Colors: Smoky Slate, Whisper White, and Crushed Curry. Stamps: Beautifully Baroque and Delightful Dozen. Accessories: Versamark, Rhinestone Jewels, Smoky Slate and White Embossing Powder. |
If you don't have time to play along with the challenge, you can still help with the challenge. Head over to Pinterest and like and repin your favorites. The player who gets the most repins and likes gets to pick the next challenge.
Monday, September 9, 2013
MDS Monday: SA Recycle Challenge #4
I'm back! It's been a little crazy around here. First, we bought a car and had to get the old one ready to sell. Then my husband had a milestone birthday this past weekend, complete with a BBQ that got rained out so we had to get the yard ready, and then the house. But I'm back now. My youngest son is back in school now and I'm ready to get back to work!
So what's the best way to get back to work? How about with an MDS Monday and a challenge!! The Stampin' Addicts Recycle Pinterest Challenges are now on week 4. I haven't had time to play the past two weeks, but Adriana posted a great Scrapbook challenge this morning for us so I opened up MDS to play along.
I love this picture of my boys with their cousins. We were in St. George, Utah for my family reunion this past summer. It was toasty hot most of the time we were there, but we still managed to squeeze in trip up the Sugar Loaf. If you are familiar with St. George, the Sugar Loaf is the big red rock with Dixie painted on it. It is just above the old family property so when we were kids we used to walk up there and play on those rocks and it's a tradition we have continued with our children as well. Only now, we have to drive up there since they built a busy bypass road between it and the old family property. But it is still just as fun to run around and climb those rocks as it was 30 years ago.
If you would like to play along in the challenge, head on over to Stampin' Addicts and check out this week's sketch:
 And if you don't have time to play along this week, head on over to the challenge board on pinterest and help pick the winner of this weeks challenge by liking and repinning your favorite. (Including this mine!!)
So what's the best way to get back to work? How about with an MDS Monday and a challenge!! The Stampin' Addicts Recycle Pinterest Challenges are now on week 4. I haven't had time to play the past two weeks, but Adriana posted a great Scrapbook challenge this morning for us so I opened up MDS to play along.
 |
| Colors: Cajun Craze, Baja Breeze, More Mustard and Soft Suede. Digital Stamps: Natural Composition Overlays. Digital Punches: Stars and Circle. Digital Embellishments: Hodgepodge Hardware. |
If you would like to play along in the challenge, head on over to Stampin' Addicts and check out this week's sketch:
Subscribe to:
Posts (Atom)